Iddy Biddy Swarm

A couple of weeks ago, early in the evening, I was closing the blinds at a window when I spotted this.

An iddy-biddy, teeny-weeny honeybee swarm.

That’s a first.  In addition to its being a very late swarm of the season–not unprecedented, but odd–it’s just so…tiny.  And, isn’t it kind of cute?

Do you see it?  It hangs from a branch just above and to the right of our hive, Buzz.

Those honeybees!  Every year, they throw something new at us.  Each beekeeping season, there’s some event, some honeybee goings-on, some mischievous behavior,  that we haven’t witnessed or experienced previously with our honeybees.  In baseball parlance (in honor of the World Series–go Astros!), there’s always a curve-ball with our bees.

The girls like to keep us on our toes.

I didn’t see the swarm as they formed and flew to the tree, but had seen buzzy activity (more than normal) around Buzz, so I must assume the little swarm was from that hive.  There are cast swarms that are subsequent swarms after a main, spring swarm.  Maybe this was a cast swarm? I’m still not certain.  There was a major swarm in the spring which situated itself for a few days in the oak tree above the hives, then moved on somewhere else.  I also know that both hives produced their own queens after the established queen died, or was killed due to its weakness. You can read about that here.  But a mini-swarm? Never, ever have I seen that one before.

A day or two later, the tree bees made their way back down to Buzz (some hung out on Woody) and over the course of a few hours, a honeybee battle ensued.  By the next morning, there was a pile of dead bees on the ground at Buzz’s feet.

Sheesh, honeybees are tough ladies!

In our recent hive checks, we noticed that both Buzz (especially) and Woody (less so) were packed with full frames of honey.  We contemplated whether we should take one or two honey filled frames from the second (top) brood box of Buzz and add new frames for the bees to comb out and the queen to lay more eggs.  This remedy would also relieve the honey bound issues.

And so we did.  More about that soon…


Rub-A-Dub-Dub

If you follow Bee Mama Missives, you might remember this contraption from the end of 2018.

Along with the new extractor is a frame knife for breaking the comb and freeing the honey during spinning and a mesh for catching the honey prior to bottling.

Its looks are fuselage-like, but is a sweet thing:  it’s our new two-frame honey extractor and in the not-too-distant future it will be recruited into action.  At the top, you see the nearly, but not completely, flat cover; just below and to the right, is the handle which turns the cage holding the frames of honey.  The spout at the bottom–with the poetic name honey gate–is typically closed, except after the frames full of honey have been whirled and twirled.  When the handle is rotated (more about that later), the freed honey will fling to the sides and bottom of the extractor, ready to flow out in glorious, golden goo.  We’ll capture the honey in a bowl, first straining it through the mesh, then bottle it for friends, neighbors and ourselves.  Yippee!

As soon as our weather cooperates–this coming weekend, I hope–we’ll open our two Langstroth hives, Buzz and Woody, to see how the ladies and their queens have fared since our last meeting in mid-October.  In that last 2018 hive check, both hives had plenty of honey:  each had one 10-frame brood box loaded for bear (no actual bears here, just frames packed with honey), plus a smaller box on top, full of the sweet stuff.

Lots of honey, which the bees probably slurped a fair amount of during these past chilly, wet months.  But until we peek in, we don’t know how much honey, if any, is left.  Plus, the honeybees could be (probably are) gearing up for action with the queen laying eggs and honey production ramping up.  So it’s time to prepare our extractor for the removal of whatever honey is left, which will also allow the bees more room in the comb for the next generation.

This is a small, two-frame extractor.  We’re hobbyist bee keepers and don’t need anything particularly big or extravagant.  It’s a manual extractor, but there are plenty of Internet videos instructing how to attach a drill to the handle, thus converting to a less manual, more automatic honey-getter.

Hope it works.  No doubt there will a Bee Mama Missive post in the future if it doesn’t.

Ahem.

Like any food equipment, it’s a good idea to wash before use, so wash we did!

Flat cover removed, let’s peer into the extractor bowels and look at its innards.  The flat bar across the top holds firm the mechanism for the handle which spins the basket.  As well, in the center of the flat bar is affixed a spindle which spins the basket-with-frames when the handle is turned.  The basket runs much of the length of the extractor body.

Insides dismantled and removed, the lid and handle are washed and left to air dry on the counter.


Bee Daddy (flashing a double thumbs-up) displays the ready-for-washing frame basket.  This is where the frames are placed in the extractor to remove the honey by centrifugal force, either by arm or drill force; we’ll figure that out when the time comes.


The chasm of the extractor’s body is deep.  It looks pretty and shiny, but I don’t want any honey spilling and filling into it without a nice, soapy scrub and a good, hot water rinse.

You’ve probably noticed that we’re not in the kitchen where normal food-related equipment is washed.  The extractor is too big, too tall, too weird for the kitchen.  So the bathroom it is and the rub-a-dub-dub commences.

Inside.

Outside.

Once washed, we let basket and drum dry on a clean towel before reassembling the extractor.    It now waits, clean and at the ready, for the bees, or more accurately, their honey.


As for the honey makers, each day’s march toward spring sees increased activity as they gather pollen and nectar.  It’s early days in the season, but it has begun.

And the flowers?  They’re opening up for business, too.

Giant spiderwort, Tradescantia gigantea

De-bugging Buzz

At the end of 2017, I wrote about the death of Buzz the beehive due to a wax moth infestation.    We have plans to re-hive Buzz in April, but winter projects on my to-do list include moving both Buzz and Woody about 10 feet from where each originally stood, and to finish cleaning and disinfecting Buzz from the yucky remains of the wax moth infestation.  I’m pleased to say that I’ve achieved both goals, well ahead of the April re-hiving date!

When we discovered the invasion of wax moths, we removed the offending invaders and most of their accoutrements, therefore the ick of infestation remaining in Buzz consisted primarily of webbing, some frass (okay, lots of frass), and a few possible larvae cocoons.

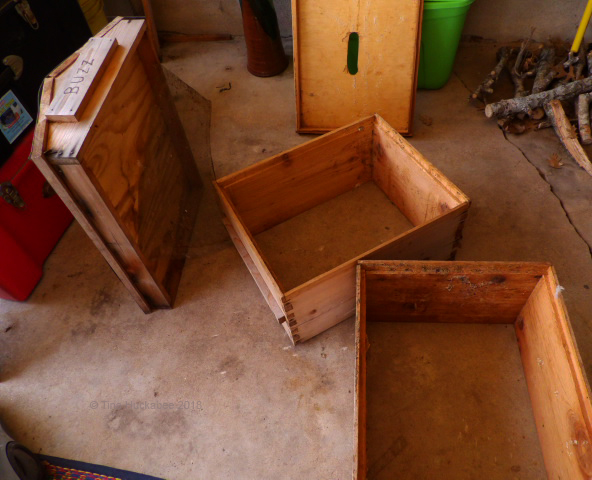
All laid out on the back patio, ready for the cleaning.

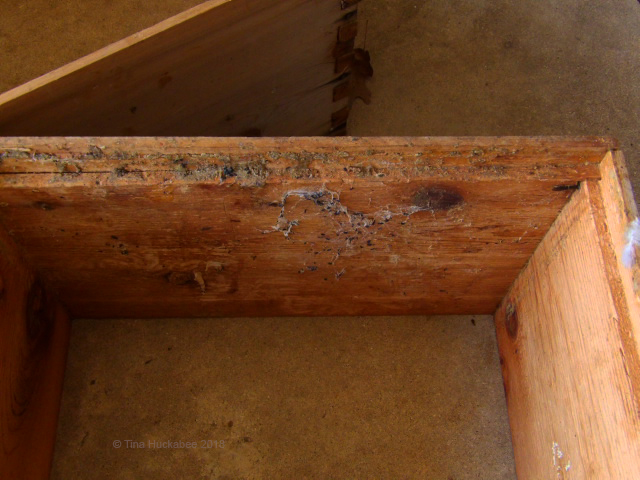
Webbing from the moth larvae, with frass in the mix. The dark spots are frass.

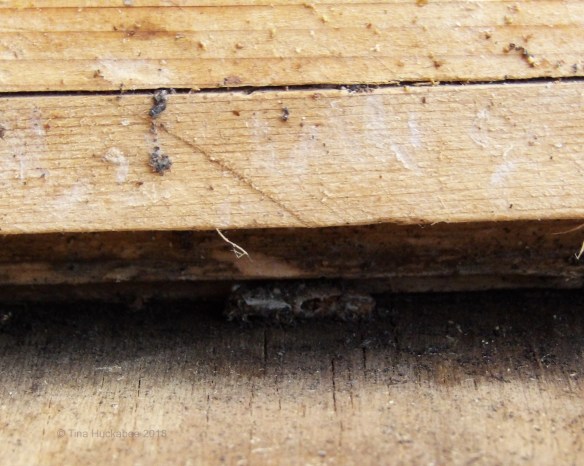
One sneaky cocoon left over from the initial elimination of the insects and their remains.

Another hiding cocoon.

I thoroughly vacuumed each box and all section pieces of Buzz, and then with brush, gloves, and bleach water in hand, proceeded to scrub-a-dub-dub the inside parts of the hive.  In some spots, I used a utility knife to clean out narrow gaps and remove the remains of cocoons.  I certainly don’t want any cocoon hanging around, awaiting release from dormancy for the purpose of reinfection.  If the new hive is strong–which it will most likely be–a re-infestation is unlikely, but just to be on the safe side….

After rinsing the entirety of Buzz with fresh water, I left the dismantled hive out for a few days in the cold to dry out.

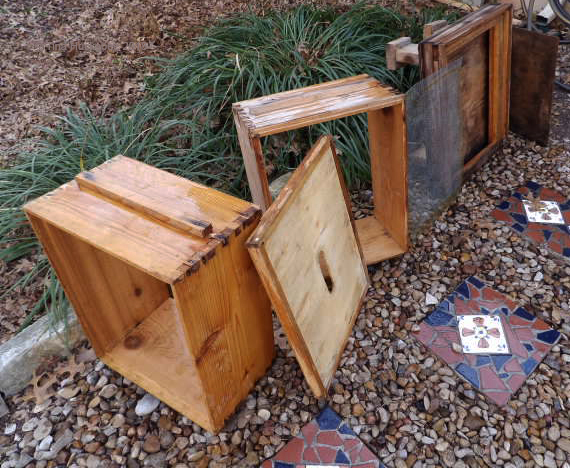
The parts shown, left to right: brood box, top lid, another brood box, mesh, base, bottom board.

There are no frames because we destroyed and trashed them–the frames were too infected with wax moth nastiness and not salvageable.


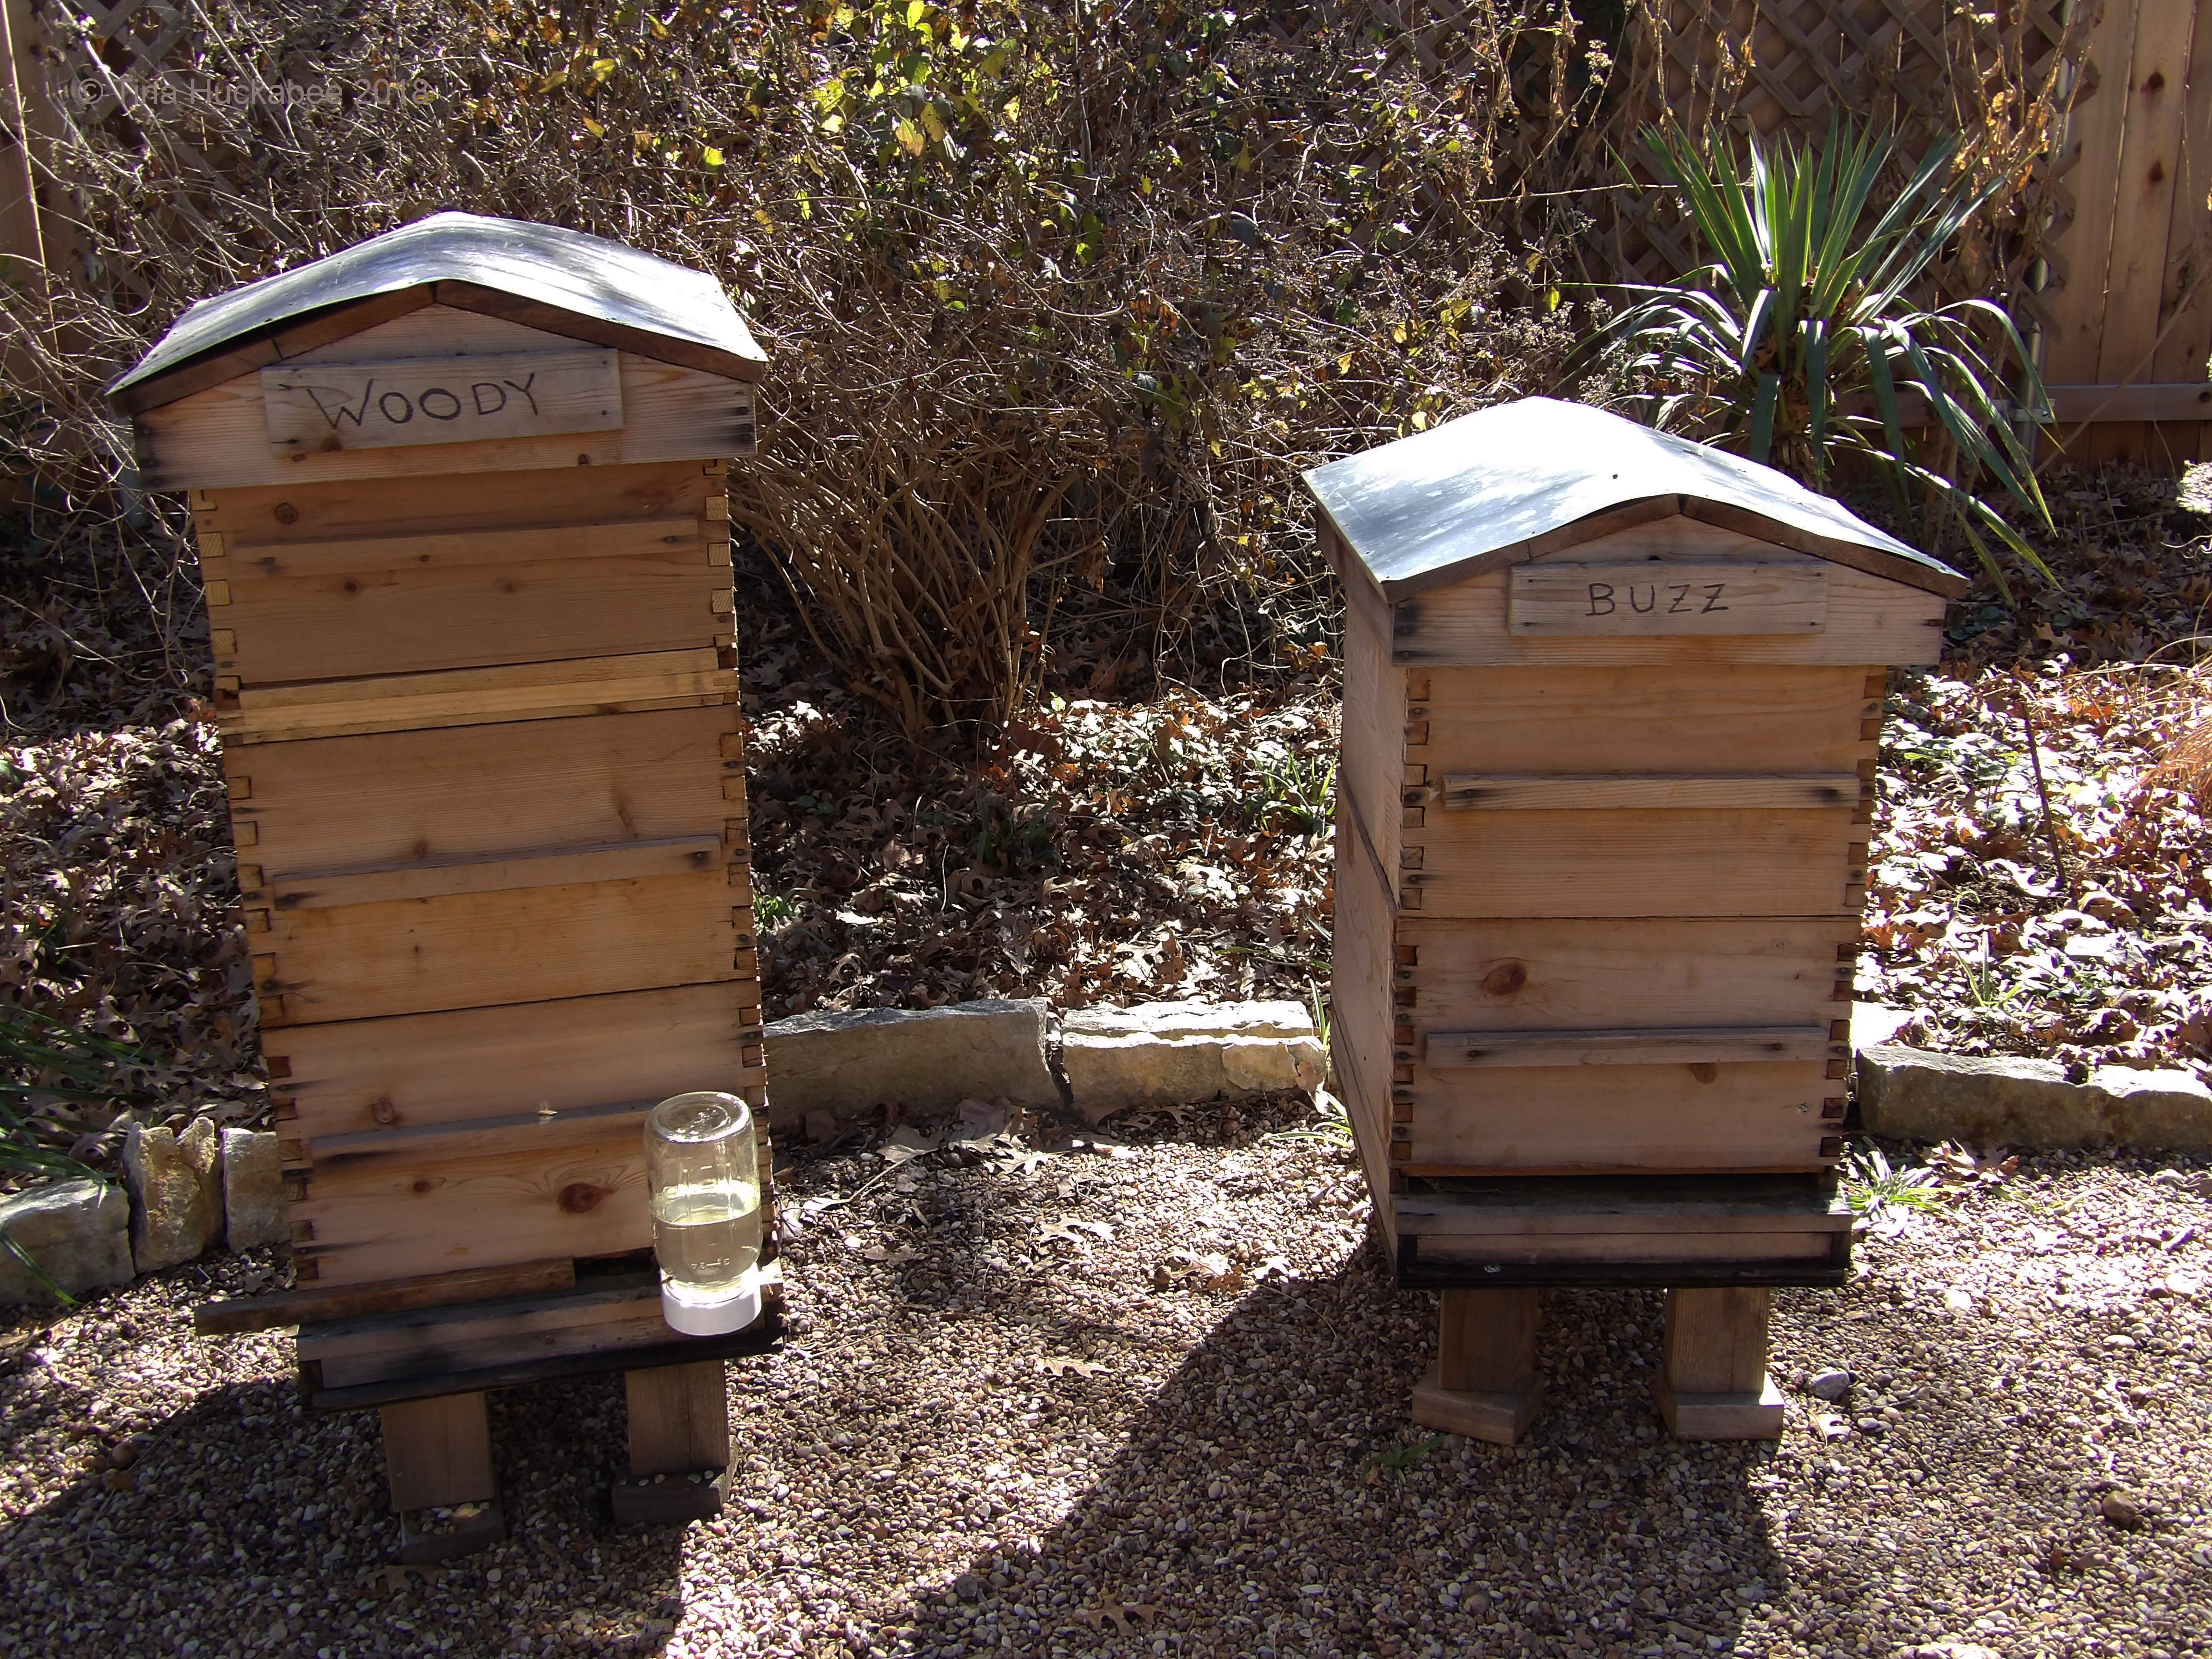
Meanwhile, we moved Woody to her new spot in the garden, and placed a marker right next door for Buzz–for when she’s ready.

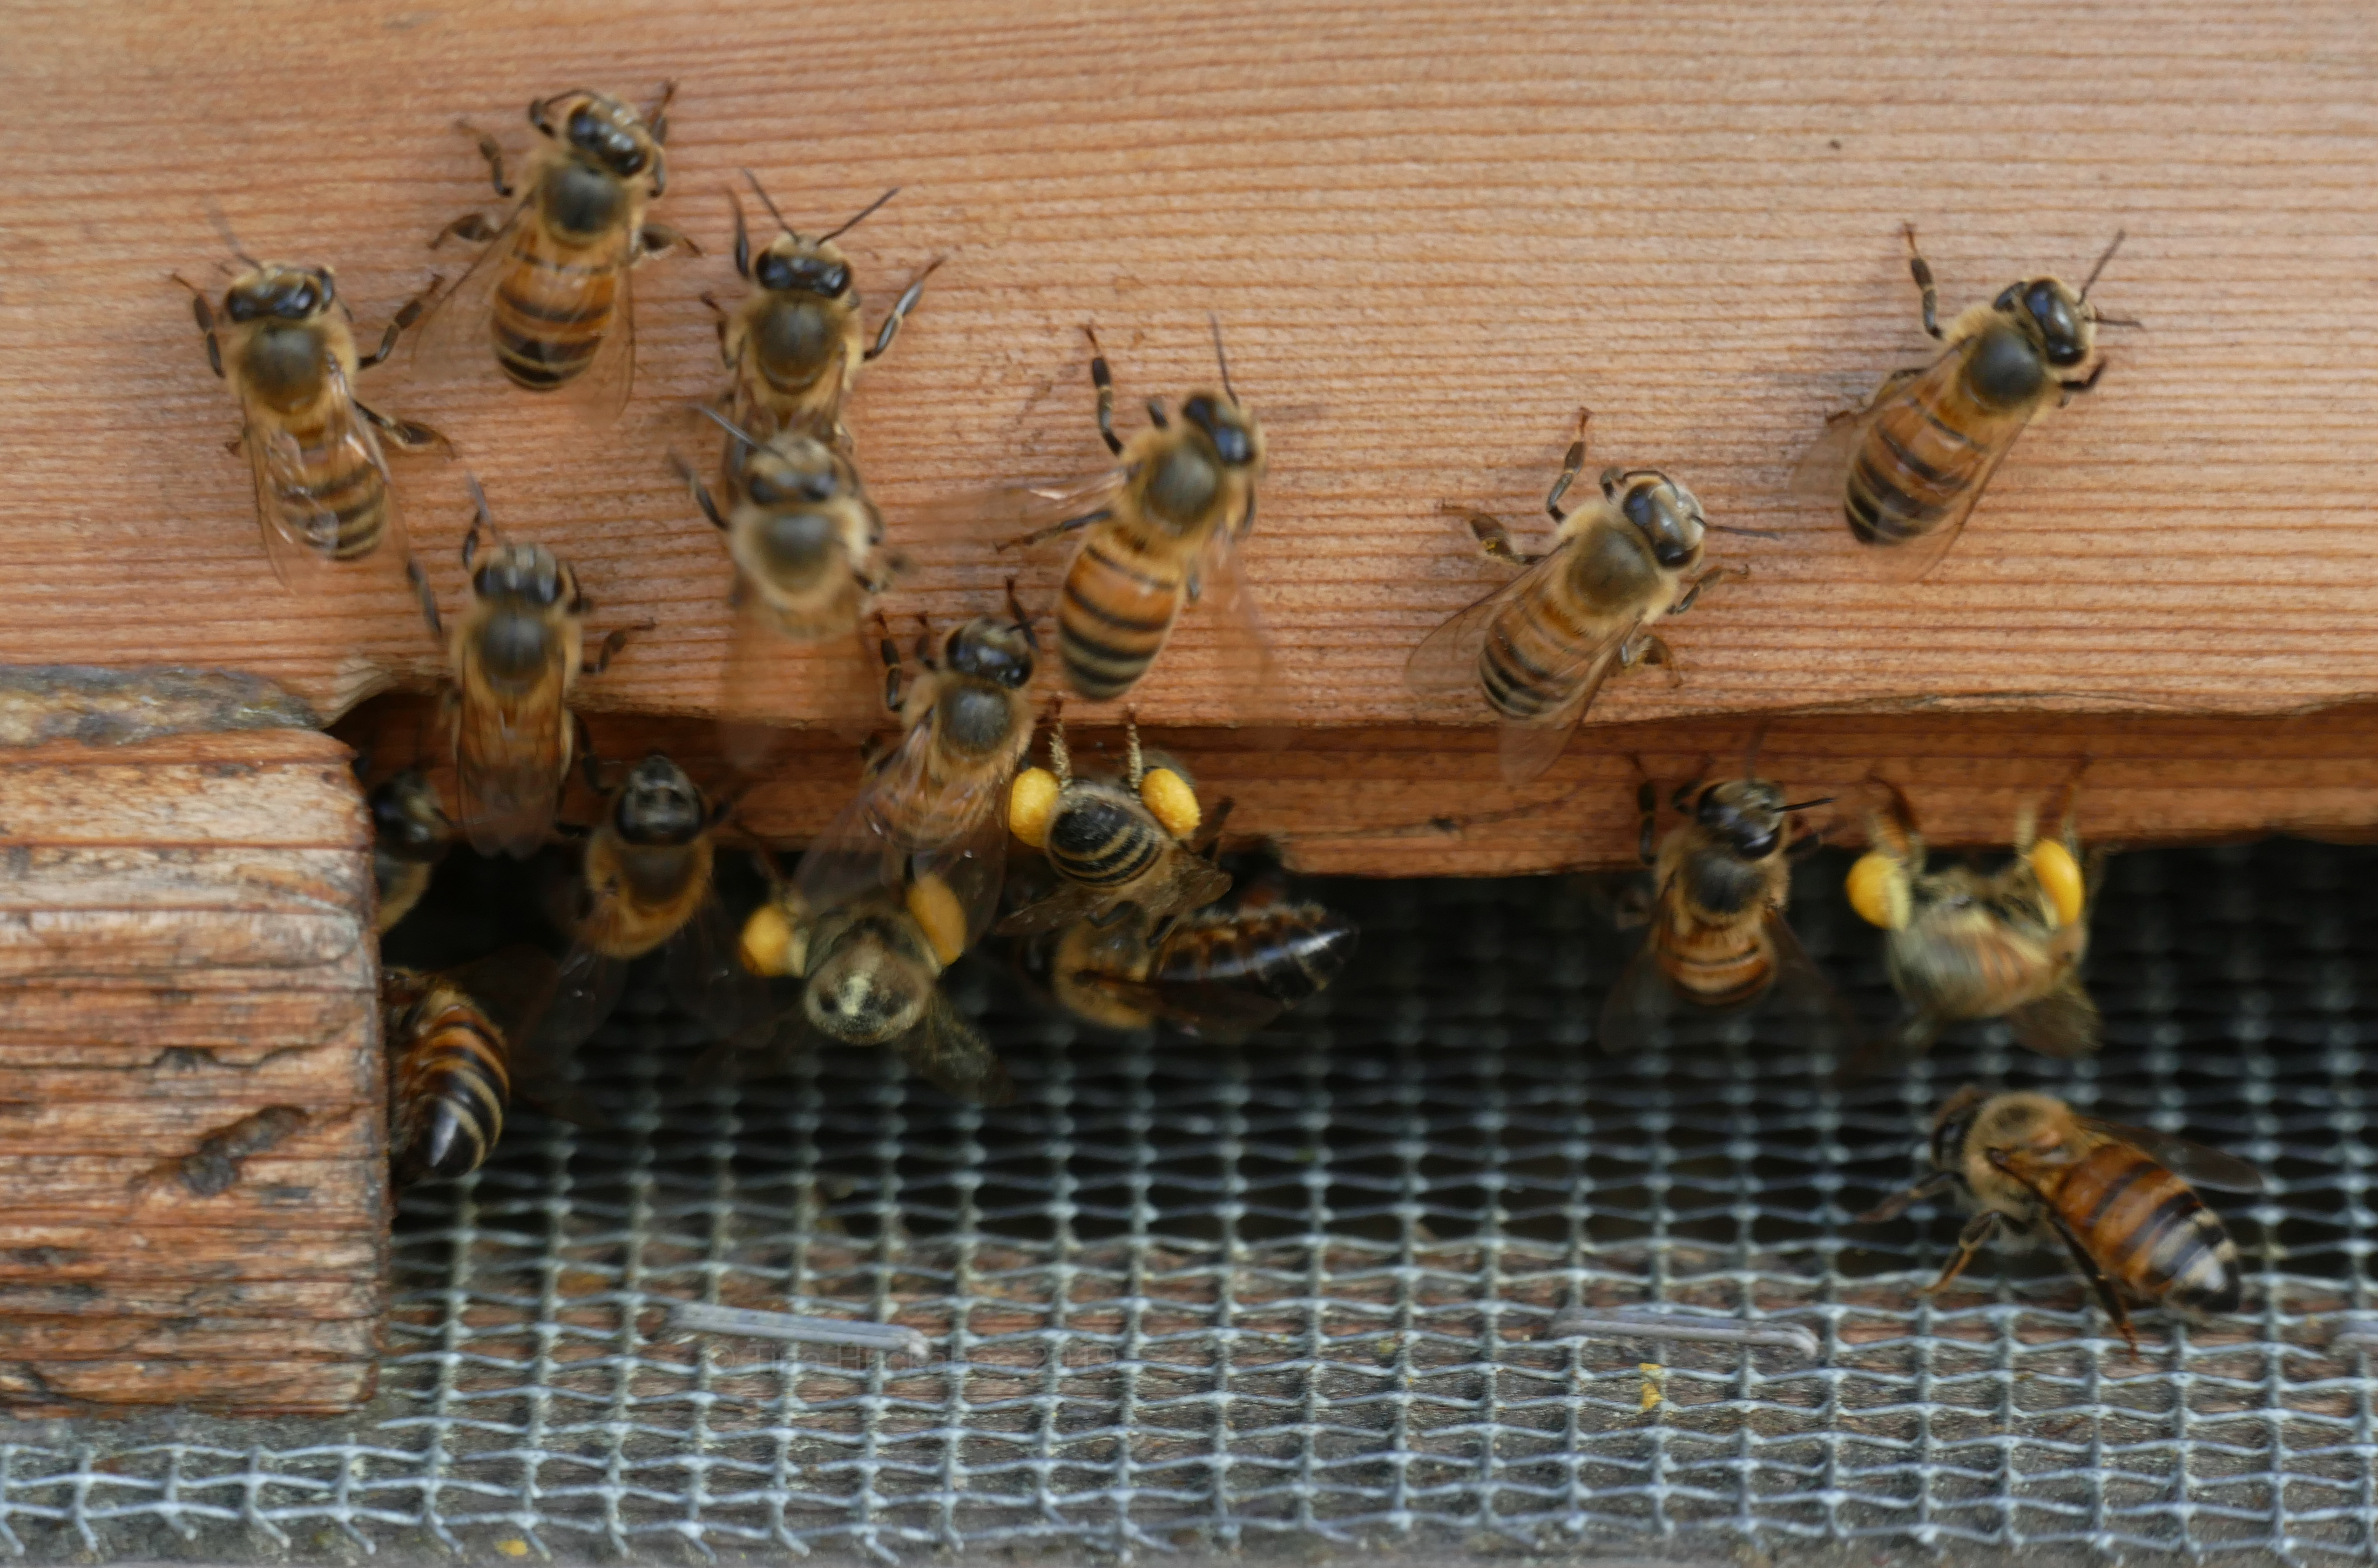
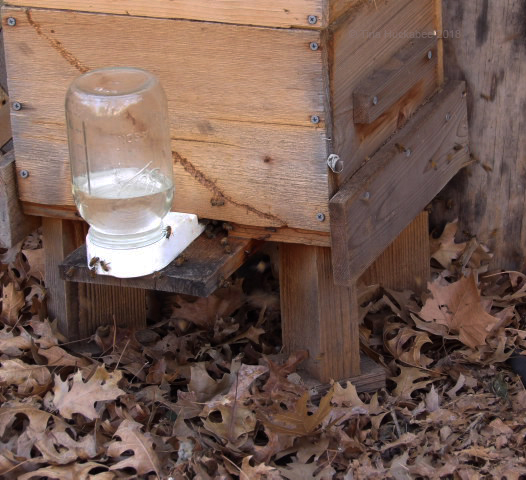
You’ll notice a bottle of sugar-water on Woody’s bottom board.  The bees are foraging on warmer days, but during this time of winter honeybees are at their greatest risk of starvation.  There’s not much blooming and it’s possible that the girls have used up their honey stores.  It’s too cold for me to check the hives, so the easiest thing to do is to mix up some “nectar” and see if they go for it–and they have!  Honeybees like their sugar!  Well, I can’t criticize, I’m well-known for my sweet tooth, too.

All situated, Woody is buzzing and Buzz is awaiting.

Of course, Buzz has no buzzy bees, so she sits, in decorative mode for now: no bees, no sugar-water, but all nice and clean and ready for spring!

Scar, our Warre hive, is also being fed.


In my garden, there’s currently little flowering, thanks to the cold, dry winter boasting of several hard freezes.  However, my three  Leatherleaf mahoniaMahonia bealei, are reliable winter bloomers and the bees are all over the cheery blooms as they open.

How many bees can you count?

Of course the bees also fly 3-4 miles for other nectar and pollen providers.  The honeybees aren’t exactly bereft of blooms, but neither are there bunches of blooms for them to choose from.

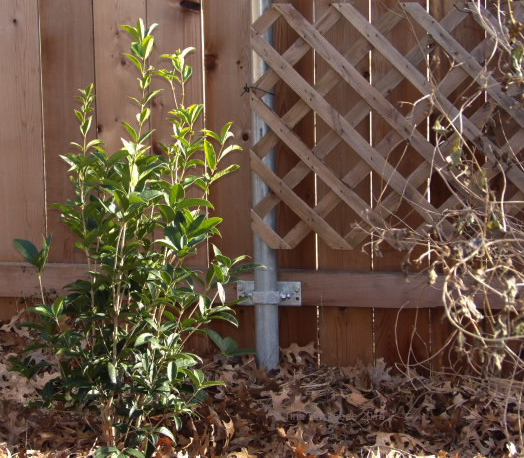
I’ve recently planted this green shrub in hopes of providing more winter sustenance for my honeys.

It’s a Sweet Olive Tea tree, or Fragrant Tea OliveOsmanthus fragrans.  I’ve been angling for a winter blooming, non-invasive, and evergreen plant, and happened upon this specimen during a nursery sojourn.  A non-native plant, the Sweet olive tree is primarily known and grown for its fragrant white blooms.  It’s drought tolerant once established and also deer resistant, though (thankfully!) that’s not an issue for me.  The Sweet olive tree is also something that isn’t particular about soil and will tolerate my clay and supposedly will bloom in sun, part-shade, and shade.  The spot I chose in my garden for this large shrub/small tree receives winter sunshine, but is somewhat shady for the remainder of the growing season.  I’m  confident that it will prove a good source of nectar and pollen for my honeybees during winter.  I also plan to add more mahonia to my garden, though I’ll probably choose other varieties than the Leatherleaf for the sake of diversity in plant material.

Honeybee season is nigh, as is the season for native bees.  The first native bees in my garden will be the Blue Orchard bees, who will emerge, buzzing and beautiful blue, from their pollen-packed holes (in bee hotels and masonry) sometime in the next few weeks.

Bees are starting to happen!